Friday, December 30, 2011

My Christmas Dress

I'm sorry the picture is blurry and not full length, but this is the Christmas dress I made. I actually started it about 2 weeks before Christmas and (seriously) finished it Christmas Eve morning. It is red crepe-back satin with little silver flecks. It is a very simple princess-line dress with 3/4 sleeves and a v-neck. 
The thing that made me happy about it was that it fit without any alterations. This is the first time that's happened since I can remember. Losing 15 pounds has been a real ego-booster. Now I know I can pretty much make any pattern from this company (sorry I can't find the pattern) in this size (I'll admit it's 16, but in off-the-rack sizes that's like a 12 or 14) and have some success at it. I'd like to start making more of my own clothes again, and it will be nice not to be frustrated!

Tuesday, December 27, 2011

Okay, not a craft but...


Who could resist a face like this?
My cat Nutmeg wore this hat for about an hour and it didn't seem to bug her. My daughter took this photo with her cell phone! (Okay, photography IS creative.)

Thursday, December 22, 2011

A gift for a friend


Our friend Patty really loves candles. I've seen some clever votive candle holders made on various blogs with thrift items. I picked up the two glasses (for wine? I'm not sure) at the Salvation Army store for about a dollar. I had some sticky snowflakes that are meant for decorating candles, but never used them. The glitter is from Martha Stewart. I also glittered the bases. I already had the ribbon. So, for less than $5, including the candles, I have a one-of-a-kind gift to give my friend!

Don't you just love the clever ideas that are out there?

Wednesday, December 14, 2011

Fun with a Santa Beard

We went to get our tree tonight. I made a felt Santa beard for Katherine, who had a lot of fun with it! BTW, I have deleted the site where the pattern for this is, so if you know of it, please lmk and I will give credit and a link!

Thursday, December 8, 2011

Matching Gift Tags

Gift tags made to match gift wrap are so cute, aren't they? (And pricey, IMHO!)
 But it you are like me, and most of your gift wrap is clearance stuff you put away last year, you probably don't have matching tags. Here is an easy solution!

You always have to trim off some of the 'wrinkled, ripped end' (after all, the paper's been sitting up in the attic for almost a year) to make the package look nice. What you do is to cut around the motifs on that 'throwaway' piece.

You aren't using the paper itself for the tags! It would be too flimsy. Instead, place them on the scanner bed of your printer. I'd cut as close to the motif as possible (unless the background is white) so you aren't wasting ink on something you're going to cut off later. I know you could cut around exactly, but who wants to do that fussy cutting twice? 

Load your printer with white cardstock and make copies! Then cut out, punch a whole, and string with ribbon. Done! Or really go to town and add some glitter! (How much would you pay for those?)

Oh, sorry there are no pictures. Obviously, gift wrap is copyrighted material. While I doubt anyone from Hallmark is looking at my blog, I don't want them to get mad that I didn't spend a few dollars on two cents worth of paper tags.

Wednesday, December 7, 2011

Another Cookie Recipe

 (This is also a reprint from my old blog. I thought about it 'cause I made up the dough today.)


SPRITZ COOKIES AND A HINT:

1 C butter, softened
1/2 C sugar
1/2 C packed brown sugar
1 egg
1/4 teaspoon salt
1/2 teaspoon almond extract
1/2 teaspoon vanilla
2 1/2 Cups flour
1/4 teaspoon baking soda
Colored sugar for decorating

In a bowl, cream butter and sugars. Beat in egg and extracts. Combine flour, baking soda and salt; gradually add to creamed mixture.
Fill cookie press and press dough 2 inches apart on an ungreased cookie sheet.
Decorate, then bake at 375 degrees for 6 minutes, or until edges just begin to brown.
Cool on a wire rack, then enjoy or freeze for later.


Now, my hint: get some zipper type bags and measure out your flour, baking powder and salt. Label the bag! Do this for any cookies you plan to make, and you will have all your messy dry mixes ('cause you know flour makes a mess) ready when you want to bake. You can use quart-size bags to measure out your sugars, too, and put this right down into the flour bag. Another mess taken care of ahead of time!

And another hint: use your weekly 40% off coupon for Michael's or A.C. Moore or Joanne's and get yourself a good cookie press if you don't have one. Wilton makes a nice one. Trust me on this, you want a decent toy to play with, not some piece of junk that is hard to 'press' and will only frustrate you. Consider it an investment! Oh, and something else: I had a battery operated cookie press and hated it. You had to squeeze it really hard, so what was the point of the batteries? Go for the old-fashioned, non-electronic, squeezey handle one!

Tuesday, December 6, 2011

A Favorite Cookie Recipe

 Truly one of the most delicious and easy cookies, ever! I have also heard them called Butternut Balls and Mexican Wedding Cakes.


MELTAWAYS

Butter Nut Cookies

1 Cup of butter(please don't use margarine--ick!)
1/4 Cup of sugar
2 Cups of flour
1 Tablespoon (yes, that's a Tablespoon) vanilla
1 1/2 Cups of chopped nuts--I like walnuts, but pecans would do if you can swing them
Powdered sugar

Preheat oven to 300 degrees. (Yes, that's 300, not 350.) Cream the butter. Add everything else except the powdered sugar. Roll into balls about the size of a walnut. Put on an ungreased cookie sheet. Bake for 35 minutes.
Let them cool until you can handle them (they'll still be a little warm) and then roll them in the powdered sugar.

Enjoy!

PS--if you ever read my old blog, "Sorta Frugal," this is a copy and paste from that. But yummy is worth repeating!

Wednesday, November 30, 2011

A new sweater for Shadow


Shadow's new sweater is based on a pattern from the December issue of Crochet Today magazine. It is made up of little granny squares. I used a lot of 'leftover' yarn for it, which was a great way to get rid of those last little pieces. It is nice and 'cozy,' which is perfect for a small, short-haired dog who gets very, very cold!

Friday, November 25, 2011

Simple Xmas Decorating Idea

These poinsettias are made from red felt. I downloaded a free printable from online and cut two patterns from it. You could even do it freehand. Just make one layer with 6 petals (they are kind of flame-shaped), then make a second layer a bit smaller with 6 petals. You could get ambitious and add a few green leaves, but that might be too thick to fit behind the knob.

Cut a small slit in the middle of each piece, remove the knobs on a cabinet, then attach the flower behind the knob.

Red looks great on a white background, but you could think about snowflakes for a dark cabinet! You could even make those out of cardstock, since there's a lot more cutting involved.
This is the first of my Christmas decorations to go out. I have too coordinate with my boys to get all the boxes down out of the attic, which I plan to do ASAP! Good thing Thanksgiving fell early this year (hope you all had a Happy One!) because it gives us more time for Christmas decorating!

Wednesday, November 23, 2011

Progress

I've got a few more rows done on the snowflake blanket. It's doubtful I'll have it done for Christmas, but I am going to show it to Katherine on Christmas Eve and finish it ASAP. I just have too many other things to do.

Today I made Jamaican Beef Patties to put in the freezer for a Christmas Eve Appetizer. The recipe is in the October 1st-ish issue of Family Circle. Not sure of the date but there are Jack O Lanterns on the cover. They taste pretty good. 

I've already started my Christmas cookies, which are also in the freezer. There are just too many kinds I want to make to wait!

Saturday, November 12, 2011

Meet Mr. Giraffe!

Here is the giraffe I designed and made for my nephew. He came out pretty good, I think! Nice and goofy, perfect for a 7-year-old! I'm going to give it to him on Thanksgiving so it doesn't get 'mixed in' with the 8,000 Christmas gifts he'll probably get. I think he'll like it!

Monday, October 31, 2011

Happy Halloween!


I didn't make this costume, but it looks so cute on Shadow I had to post it. After I got some photos and took it off, he 'attacked' it. Grrrr....

Saturday, October 15, 2011

Baby Blanket Gift

Dr. A loved the baby blanket I made for her granddaughter. I almost didn't give it. When I laid it out, it was a little crooked. I think I am my worst critic. I actually started a new baby blanket and brought it to Ohio to work on. Got 20 rows done there. But when I got home I realized, at the rate I work on things, it would be 2 weeks or more before I finished it. And I have Christmas things to work on.

So I looked at the original blanket again and decided that only a judge in a contest would find it's flaws.  Most people that I know personally wouldn't even know how to hold a crochet hook, let alone make a blanket. I have to stop being my own worst critic. This is why I haven't started an Etsy shop yet, despite joining. Nothing that I make, to me, is good enough to sell. 

But, like I said, the baby blanket was a hit. So now I have a half-finished one for a future baby, too! I put it away with notes about the hook, yarn and pattern. Something to work in next January!


Friday, September 23, 2011

Silhouette Pumpkin

Silhouettes seem to be all the rage now. You can find examples in just about every October issue of every crafty magazine out there. I love the idea of doing something that is so easy and relatively inexpensive!
This little guy came from "Country Living" magazine. I downloaded the template from their website and traced it onto a white fake pumpkin. Then I just painted it with acrylic paint. The "Nevermore" was my own touch, since I can't think of a Raven without the quote from Edgar Allen Poe. BTW, did you read that poem in school? I can remember about 3 lines from it, and that it was about a girl named Lenore. 
I don't have my Halloween decorations out yet, only my Fall ones. I'll probably do Halloween next week, since I'll be in Ohio the first week of October. The first of the month is when I decorate for any given holiday (although I probably start Christmas soon after Thanksgiving since it is such a BIG holiday.)

Saturday, September 17, 2011

Baby Blanket

I have finally (after about a year!) finished this baby blanket. Almost...I just have to weave in the ends. It is a gift for Dr. A's granddaughter. (BTW, I called her 'Riya" in a previous post, I think. Her name is actually "Diya.")  The repeat of the rows is like this: singles, singles, doubles, then a row of front post triple crochets. In the FPTC row, you do two stitches, then skip a stitch, do two more, and then you take the 6th stitch and pull it back to that skipped stitch. It makes a crossing pattern that is really pretty.
I noticed that on the back, the post rows made a kind of 'ridge.' So what I did with the next row (all singles) was to 'catch' half of each stitch before the FPTC row, pulling in the ridge. It flattens out the back, which I think will be more comfortable. I'm sure that doesn't make sense at all, since I don't have any idea how to write crochet instructions, but trust me, it works.
The border around the edge is very simple: in the first round, you just do all singles. Then you do a single, half and double in a stitch, skip two stitches and do another sc/hdc/dc all around. In the second round, you do a sc/hdc/dc in the 'spaces' between the stitches.
This would have been done for me to take to work today, but I got started on a HUGE organizing project. Our attic ladder/doorway is broken so you can't go up and down it too much. So I handed down about six boxes of Fall/Halloween/Thanksgiving stuff to my husband, as well as a box of sweaters. (It's already feeling like fall here--yay!)
I wasn't planning on sorting through it all but once I got started I just went with it. Managed to reduce six boxes down to four. Once I start to decorate, I can sort even further and decide on more things to either go to charity or decorate the office with. It's a big task but at least it's 90% done!

Come to think of it, most of my tasks seem to always be "90%" done, LOL!

Sunday, September 11, 2011

Diaper Cake Finished


The baby shower was supposed to be today. Dr. A had rented tents for the back yard, and I brought the 'cake' over last night. The only problem is...
Baby Riya decided to be born 3 weeks early! She came into the world yesterday morning weighing 4 pounds and change. She's totally healthy, Thank God. So she'll be using the diapers sooner than we expected. The booties (which I made myself since I refused to pay what they're asking for plain old ordinary ones) won't fit her for months, LOL! I didn't even ask if she has hair. In fact, I almost forgot to ask her name! I guess I'm as surprised as anyone. 

So her birthdate is 9-10-11. How's that for an easy date to remember?

Tuesday, September 6, 2011

Diaper Cake


Dr. A asked me if I could make a "Diaper Cake" for her dil's upcoming baby shower. I have never done this before and did some research on line. The first version I found was so complicated I actually had dreams about goofing it up. No kidding.
Then I found a great tutorial on You Tube. It involves simply rolling the diapers into 'candlesticks' and securing them with clear hair elastics. Then you place them around an inner form created by a baby bottle. (Actually, it's two baby bottles on tpp of each other. 
You are supposed to use a giant rubber band to secure the large rounds of diapers. But that would have meant hitting Staples right before school starts. No thanks...
I used thin pink ribbon to tie the 'layers' together on the bottom. Then I used baby hair bands for the top layers.
The baby bottle was sticking out of the top, so I just wrapped it with two diapers. 
I have only added 2 pacifiers for decorations. I want to get some rosettes and some more little baby doodads for more decorations. I'll put either a little stuffed animal or a pair of booties on the top.
All in all, I don't think it was a bad first try!

Friday, September 2, 2011

Wire hider


Or whatever you want to call it. The wire on my mouse is too long for my small desk, and was always getting 'caught.' So I made this big flower thing to hold some of it. The petals are sewn wrong sides together, then pinked. The middle of the flower is two pieces of felt, stuffed.

I cut enough petals to sew around one circle, each with a little pleat to give them 'shape.' Then I sewed a piece of elastic across the back of the second felt circle. I sewed this to the back of the flower, with a little stuffing inside.

You get the size of your flower by folding up your wire. You want the flower to hide it. The elastic holds the wire nicely.You  just have to let out however much wire works for you.


Saturday, August 27, 2011

Kind of Like Tetris


Did you ever want to use a piece of fabric for a project, but found it was not big enough? It might just be, if you play 'Tetris' with your pattern pieces!

Just cut them out in a single layer, rather than on doubled fabric. Cut one out (as you can see I did with the T-shaped pattern for the 'bucket' from the book I told you about in the previous post) and then flip it upside down and fit it onto the rest of the fabric! You could do this with any pattern, I think. Just don't forget the 2nd piece (although not in this case) is usually a 'mirror image.'

Hope everyone is staying safe as Irene rushes up the coast. We are as ready here at my house as we could ever be!

Friday, August 19, 2011

Straight Line Sewing

Even after 40 years of sewing, I'm always on the lookout for the easiest, but nicest-looking, projects. So when I read (somewhere) about a book called "Sewing in a Straight Line," I had to check it out. A brief sample on my NOOK and I knew I wanted it. I actually used some money from the gift cards to Barnes and Noble that my kids gave me for my birthday last January to buy the actual copy, not a NOOK download. I'm glad I did.

The author is Brett Bara. If you are lucky enough to get "Crochet Today" on public television, or if you've read "Crochet Today" magazine, you'll know who she is--the girl with blondish-brown hair and blue eyes. Who knew she was a sewist, too? And the book is true to its title: all straight lines!
The book if full of adorable and quick ideas, even clothing! Above is the "Clutter Busting Bucket Tote." Mine is a little saggier than the book's since I used what was on hand (she recommends canvas for the outside and I would guess the interfacing should be stiffer.) I'm using it to store my 'baby' yarns. (I should also point out that I just topstitched the straps to the outside. In the original, they are in between the layers.)

I also made a pillowcase, but you've seen enough of those without a picture.


Now I'm going to go check out her site: www.brettbara.com.


Saturday, August 13, 2011

A project for next summer


I've always wanted to make a "Disappearing 9-Patch" quilt, so when Joanne's had some bundled fabric on sale, I decided it was time. I chose patriotic prints, as you can see. I cut the 9 pieces of fabric (actually, there were 7 in the bundle, I think, and I added 2 more fat quarters) the same size then sewed  a big 9-patch quilt with them. (Not so big, really--it's about 60x60 inches.) It is nicely ironed at this point, and this is as far as I'm going this year with it.

I haven't taken my Fourth-of-July decor up into the attic yet, but I just thought I won't put this in with those items, after all. If I take it out before Memorial Day (when the first patriotic decor goes up) it will never be finished in time.

So I think I will put it in with my Easter/Spring decorations. Or maybe St. Patrick's Day...that will certainly give me plenty of time to work on it!


Friday, August 12, 2011

Canning today (again)

Yesterday I cut up tomatoes, peppers and onions for salsa. I made it up today.

Recent lessons learned:

1. Just because something looks like a canning jar doesn't mean it really is! So if I buy them at garage sales again, I will look for "Mason" or "Ball" on the jar!

Why was this lesson learned?  Well, I noticed bits of vegetables floating in the water where I was processing the 2 pints of salsa I made. (More on only getting 2 pts. next.) At first I thought I just spilled some on the side and didn't notice.
 
Then I spot more and more...so I lifted up the jars. One jar was fine. But the other?

The WHOLE FLIPPING BOTTOM BROKE OFF! We're talking jars hot from the dishwasher, with hot salsa (it's a cooked recipe), so it isn't like there was a quick temperature change. Needless to say, that whole pint had to be trashed. Fortunately, the other jar is completely intact, so it  wasn't a total lost cause.

2. Five or six big tomatoes make very little salsa. Which would be okay if I hadn't lost half my batch. However, (and this is really the lesson), I need to find tomatoes that don't cost 3.99 a pound. And that's from a farm stand! I guess it is time for Mike and I to take a ride out on Long Island to visit farm stands more east of us. As for my own garden, I got a big 4 tomatoes so far. Wow. At least they tasted good.


Right now I have grape jelly processing (thanks for the pectin, Maryann!) and so far, so good. It's an easy recipe with just grape juice, sugar and pectin. I've never made it before. I hope it comes out good.

 When I was a kid, my mother made the best grape jelly from grapes that grew in the corner of our backyard. I have never tasted anything like that again in all my life!


Thursday, August 11, 2011

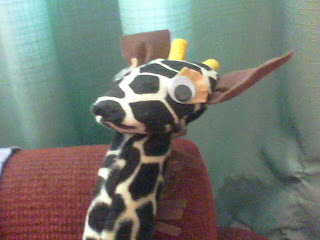
Giraffe head


Yes, his ears are off-kilter. In the words of the great PeeWee Herman: "I meant to do that!"

Actually, I didn't. But sewing in the ears and those horns was a pain in the you-know-what, so they stay as they are. Nothing in nature is perfect, anyway.

I don't know if you can tell, but the back of the head is in two pieces. This creates a 'pocket' that the top of the neck will fit up into. (The neck isn't stuffed yet. I just tucked it in there to show what I mean.) I'll have to hand sew it shut, obviously. 

The google eyes I bought turned out to be way too big, so I'm going a size smaller next time I hit Michael's.

I would say Mr. Giraffe is 90% finished now! 


Wednesday, August 10, 2011

Snowflake Quilt, cont.

Row 3 is stitched together, and ready to be added to the first two rows, as you can see. It's coming along!
Basically, I had to stop blog-hopping and spending my time drooling over all the inspirational crafts out there and get down to actually DOING something yesterday, LOL! It's easy to get lost in bloggy-craft paradise, isn't it?
I also made what I hope will work for horns for the giraffe. I simply rolled up little rectangles of yellow felt very tightly, then stitched them shut. The head is ready to assemble.
I see both of these projects being done in plenty of time for Christmas!


Wednesday, August 3, 2011

Apron, mostly done


The apron is done except for putting on some ties. As you can see, it's reversible. I used fancy stitching for the heart appliques because it shows up on the other side. It isn't very visible against the busy floral background, but it's there.
Can you see how the bias tape has different colors? (Can you also ignore my messy office?)

Tuesday, August 2, 2011

Apron part III or so


I think it's fun to make multi-colored bias tape with fabric scraps. This is the binding that goes around the apron. 
There are many excellent tutorials on line to make bias tape, especially the continuous kind. Mine is in sections, obviously. You simply fold your fabric into a triangle so that the lengthwise grain edge meets the crosswise edge. The slanted fold is now your bias. If you measure along this fold, remember to only  measure half the width of your tape! (When you open the fold out, obviously you'll now have the full size.) I measured an inch from the fold to get a 2-inch-wide strip.
Then, being somewhat impatient and non-fussy, I just used that 2-inch strip  to mark off more 2-inch strips. (I do like wide bias tape, LOL!) Then I just sewed the strips together. (I'm thinking of making templates for this in various widths out of cardboard.)
As you can see above, I folded the long strip in half and ironed it. Then I folded the raw edges into the center. (That step is obviously the top photo.)  The result you get is super-cute, original and colorful bias tape!
I took pictures of the apron, which is now finished except for the ties. I either have to plow through my fabric stash and find something to match or go out an buy ribbon. (For all the ribbon I have, nothing works with this, LOL!) Pictures tomorrow, I promise!


Monday, August 1, 2011

Apron, continued

Cut another strip as wide as the apron and as deep as you want it. Sew it along the bottom edge of the top piece. I just sewed it right through the blue 'lining' apron.


Fold and press. Repeat this with as many strips as you want. Mine only has 3. I'll show you the rest next post, as well as the bias tape I made for it.


BTW, almost  finished one sock and 90% done with the other. They look sort of weird but they fit. I also have two rows stitched together for the snowflake blanket and five snowflakes ready for the next row. Picture soon, I promise! 

Saturday, July 30, 2011

A new Apron project

I recently bought a package of cloth napkins on the clearance rack. For some reason they are 28 inches squared. Who on earth needs a napkin that is bigger than 2 feet on any side? Did the makers think someone was going to a luau and planning to eat the whole pig?

Okay, so I decided to make one into an apron. Actually, one side of an apron. I simply used an old apron to mark and cut the armholes.

Then I cut off all the selvedges. You'll see why in a future post. I took a piece of scrap fabric, cut it to fit the top 1/3 of the apron and sewed it on--wrong sides together. I'm binding this, not turning it inside out. 

The apron is almost finished but I will post a picture or two at a time.

Friday, July 29, 2011

4 p.m. slump


I hit the late afternoon slump a while ago. Glad I got a lot done earlier, LOL! That includes 20 minutes on the Wii and about an hour schlepping around doing housework. Oh, and I made cookie bars. Here is a link to the recipe:

No Bake 5-ingredient Granola Bar


 On the creative front, I sewed appliques on an apron I'm making (that's a future post) and crocheted quite a few rounds on some socks (another future post). I changed my machine thread to light blue for the apron, but only after doing the giraffe's body. Here he is, headless and stuffed, LOL! I'm hoping to hit the crafts store tonight and maybe find some big, goofy eyes for him.

Thursday, July 28, 2011

Look, I got an award!


Barbara of "All About the Buttons" was kind enough to give me a blogging award. Cool! Here's the link to her site:

http://allaboutthebuttons.blogspot.com/2011/07/versatile-blogger.html

Check it out, it's really sweet! 

The rules of the Versatile Blogger Award are:

1 – Make a post and link it back to the person who gave you the award (and include their website address)
2 – Share 7 random things about yourself
3 – Award 7 bloggers with this award and contact them to let them know they have won

Seven random things about me:

1. I am working on a mystery novel, which will be my 16th published work if I ever actually finish it.

2. I can trace one line of my family tree back to the 1600s in Germany.

3. I love a good horror movie or novel but hate gratuitous bloody stuff. It better have a purpose in the story line or not be there. Eerie is much better than gory, IMHO.

4. I am a magazine addict and have a sloo of them on my NOOK. Everything from "Country Living" to "Discover."


5. I am about 30 pounds overweight and just joined WW online two days ago. So far, so good.


6. I'm married 30 years but this November Mike and  I will have been together for 40 years. Yes, we were high school sweethearts.

7. I love almost all animals, even the furry, pesty ones others don't like. I have squirrels who will actually come running when I call to them.

And that's all about boring ol' me.

Now, on to the awards:

1. Terri, of "Hearts in Service" http://heartsinservice.blogspot.com/
2. Rhonda of "If you do stuff, stuff gets done" http://ifyoudostuff.blogspot.com/
3. 'Crownring' (sorry, I don't know your  name) of "Mercies and Musings" http://merciesandmusings.blogspot.com/
4. Granny J of "Granny's Place" http://grannyjsplace.blogspot.com/
5. Kelly Howard of Chick N Charge http://chickncharge.blogspot.com/
6. Olga of Olga's Home and Garden Blog http://olgapoltava.blogspot.com/
7. Cris of "Real Farmwives" and others http://www.realfarmwivesofamerica.com/

Okay, that's 7! I hope you visit these nice blogs soon!

And thanks again, Barbara!

Wednesday, July 27, 2011

More Giraffe

Here is the giraffe with his neck and two 'arms' sewn into one side of the body. The arms are stuffed but I haven't stuffed the neck, yet.
The body is a simple rectangle that has been rounded at the top to make 'shoulders.' The dimensions of the toy are based on the piece of faux 'hide' that I have--a strip from the longest side made the neck, then I just worked from there. The trick was to remember I needed at least two of everything, and 8 of the legs! The head is a little strange, but I'll post that when I get to it. Figuring out how to put it together was a bit of a sewist's engineering feat.

Speaking of feat, I mean feet--he's going to be about 2 and a half feet tall! 


Friday, July 22, 2011

Turning A Giraffe Neck


Not a real giraffe, of course. It's way too hot to visit the zoo, LOL! (Nearly 100 here on Long Island.)  I'm making my nephew a stuffed giraffe for Christmas. I have found that when you are turning a long piece of fabric, sometimes a simple ruler is your best tool! You can really push it into the tube and the corners are perfect for pushing out the corners.

I made a muslin of the giraffe to work out how he'd go together, before cutting into the faux fur. I've got some notes I jotted down, like: "attach the neck to head and body so that the seam is in the back and the mane is in the right place!" He's my own design and I will show you each step as he goes together. I think John will like him! 

On the crochet front, I did all that early in the morning before it got too hot to handle yarn. I even stitched together two more hexagons for the snowflake afghan and wove in some loose ends. 

This afternoon, I actually did two quick rows on a square for a new baby blanket, about 50 stitches total, before I said, 'no way.' Too bad yarn makes your hands sweat. It really is more of a cool weather craft, but who has time to wait until fall?

Back to the mane: I simple basted a strip of brown felt onto one side of the neck, then sewed all 3 layers. Then I clipped along the mane to make it fringey. 

Have a nice weekend (I seem to only post here about once a week, terribly blogger that I am) and stay safely cool!


Saturday, July 16, 2011

Channeling My Inner Nerd


Making things out of duct tape is such a Poindexter thing to do. But there are so many nice colors and patterns of the stuff how there, how long can you resist? 

I made this little thing by tracing an "Extra Gum" packet onto duct tape 'fabric'. The gum pack closes with that tab, but I don't have a utility knife handy so I punched a whole in the tab. Right now I'm just tying it shut with yarn, but I might figure out something better to do.

There are a lot of places to learn how to make duct tape wallets and more. I think you could use this particular idea (probably not original, but original to me!) for a cute little sewing kit. Or maybe you could find a pad to fit inside it and some mini gel pens? I think it would make a cute stocking stuffer!

Friday, July 15, 2011

More on the Snowflake Afghan

As of today, this is where I stand on my daughter's snowflake afghan:

One finished corner 

Eight completed hexagons

Fifteen stars
For a total of 24 out of the 43 or so hexagons I'll need to complete the blanket. I might actually get it done this year!

Oh, and since it is a Christmas gift, my cat Melody graciously volunteered to stand in for the "Partridge in a Pear Tree."

(PS--pay no attention to the trash that fell on the chair. I didn't see it before I took the picture!)


Thursday, July 14, 2011

Iced Tea Idea

I'm sure a million other people have thought of this, but it's sort of new to my brain. 

Next time  you have iced tea, instead of using ice, use frozen fruit! You know, those strawberries you've been freezing for smoothies? I put a few whole, frozen strawberries in my iced tea today. (It's peach flavored from Crystal Light. I never buy diet stuff but had this at a friend's and really liked it!) 

As the fruit thaws, it actually adds extra flavor to the iced tea. Then, when I was about halfway down the glass, I put it in my  Magic Bullet and made a strawberry iced tea smoothie! Yummy sweetness with very, very few calories! 

Wednesday, July 13, 2011

I like aprons

Aprons are so much fun, aren't they? Such a great use for so little fabric and effort. Here are just three of mine out on the clothesline--more along the line but I couldn't get them all in a picture. One thing I always do with the aprons I make is to sew a washcloth into the waistband. This gives you something to wipe your hands on besides the apron itself.

 The two to the right are from the book "A is for Apron" using my own choice for fabric. The pattern for the one with the red flowers is my favorite because there are no gathers in the waistline. It's cut on a curve and sits nicely on you--and doesn't add extra weight to someone who is already pudgey.

For the middle one, I used two fat quarters. I cut one in half and sewed it to either side of a whole fat quarter, then cut the pattern from there.

The first apron isn't from the book. It's just a half yard of fabric, plus the trimming.

There are so many ways to make aprons, aren't there? And I just love how they look on the clothesline...so colorful!

Sunday, July 10, 2011

Leftover Potato Salad Trick

I used those little peanut potatoes for salad on July 4th, made simply with mayo and mustard. I had about a half cup left over by the end of the week. So I put it in my Magic Bullet, added some cream and milk and blended it up. Then I poured it in a bowl and heated it up in the microwave. Topped it off with some cheese and voila--cream of potato soup! And there was nothing else to do with it because it already had all the flavor in it.

It was rich enough to make two servings, so I had some today, too. Today I just broke up a piece of Kraft cheese (like you put on burgers) and heated it together. The cheese melted right into the soup and made it soooo rich and yummy!

So next time you have just a little leftover potato salad, break out the blender/food processor/Magic Bullet and make yourself some luxurious Cream of Potato Soup!

PS--about the pickles I made yesterday. Keeping the skins on certainly gives them more 'snap.' They came out great!

Saturday, July 9, 2011

Knitting in the Laundry Room


Ha, I think that would be a great title for a new blog, if I ever start another one. Can't seem to keep up with the ones I already have, though.

A few posts ago I wrote about finding a little time here and there for projects. This is one example: I'm working on a little headband. It is made of cashmere yarn that I bought with one of those 40% off coupons. Cashmere is something I'd rarely pay money for, and it isn't likely I'll make anything big out of it. I did do some fingerless gloves for my daughter for Christmas last year. But it's nice to be luxurious once in a while.

This is from the July Issue of Crochet Today magazine. It will also feature a flower, but then you're talking about circular needles. I have no idea yet how to use them (that? it's one piece) so I'll probably crochet the flower for now.

The lacey pattern on this is stupid easy, even for someone like me, who is only two steps beyond 'raw beginner.' I would like to try to knit more along with my crocheting, so little projects are a good way to start. 

I also made another batch of Fridge-to-Pantry pickles today. Two farmstands opened up near me and I bought these cute little Kirbys. I left the peels on this time around to see if that makes the pickles crispier. We'll see! 

Saturday, July 2, 2011

Christmas in July

Fourth of July is Monday, so of course I'm thinking about Christmas. I have been working steadily on a snowflake blanket to give my daughter for Christmas. Today I counted that I have 9 snowflakes and 9 more snowflakes with borders. That makes 18 out of about 43 that I need. I hope to finish this by this Christmas, but it can always be a "First Christmas" gift after their wedding next year, too!

This is from the December 2009 issue of Crochet Today magazine. It is slightly different in that I did not do the picot edging. 

Thursday, June 30, 2011

Potato Cuteness


Aren't these cute? I got a box of them at one of the farm stands the other day. They are called "Peanut Potatoes." I've never seen them before. Since they have the whole red, white and (sorta) blue thing going on, I will probably make a nice potato salad out of them on Fourth of July!

Tuesday, June 28, 2011

Jam


 Top photo is freezer jam. Bottom photo is pantry jam.


Mike and I went out on the Island today, as he had a job site to do. We hit some farmstands on the way back. Alas, farmstands are few and far between here on Long Island these days. But I did bring home four quarts of lovely strawberries, locally grown. It was a pick-your-own place. And no, I didn't pick my own. I'm not capable of that with my back problems. I'm willing to pay an extra 50 cents a quart to let someone else do the work, LOL!

So I bring them home and start making jam. I was prepared for this 'cause I picked up some fruit pectin yesterday. Fruit pectin is almost as hard to find as farmstands. Nobody on LI cans, I guess. (Either that, or they do and they took it all.) Anyhoo, so I have this magazine from BH&G about canning (full of beautiful recipes) and I look up strawberry jam.

And I cut up 12 cups of strawberries.
 
Only to find the fruit pectin I have is meant for 'small batch' and I only needed about a cup and half of strawberries. (The mag recipe is for a big batch.) Can you imagine, it was the ONLY envelope of the stuff the store had?

But I had also bought some freezer jam packets. So I'm able to make both processed/pantry jam and freezer jam with all those strawberries.
 
The small batch only made 4 of the tiniest jars, like maybe 2 cups' worth. But now I know how much a packet makes and it will be a good way to experiment with some other things. Meantime, with all the strawberies I have left I might make some Strawberry Rhubarb Salsa, which does not require pectin. 
I'm worn out. Gonna go relax with my NOOK. My mother cans 60+ jars of this or that at a time. Me, I'm tired after maybe 8 jars.

Thursday, June 23, 2011

A little at a time

I was just thinking recently that there aren't enough hours in the day for all the crafting I want to do. So many cute crochet and sewing projects! But I have set myself up to do a little at a time on some of them, finding opportunities here and there:

I'm working on a child's scarf (to match a hat already finished). I keep it down in the laundry room and polish off a row or two as I wait for that last five minutes or so the machine needs to finish.

I've got a new pair of socks in the works. I keep it in a baggie, next to my bed. I do most of my reading in the morning, and most of that from my NOOK. I work on the socks a little bit at a time, between pages or when something is downloading. I have finished the ridged tops and am now at the round and round part. I try to finish at least one round on each sock each day.

When I go to my sil's house, I bring smaller projects with  me--or parts of bigger ones. Like the snowflake quilt I'm making for my daughter. One motif at a time and eventually I will get the whole thing done.

If I want something that is 'mindless' and doesn't require looking at the directions, I just bring my needle/scissors 'chatelaine' (See link below) and a few projects and weave in some ends! 

Scissors/needles holder

There may not be time to do it all, but there's often time to do a little!

Sunday, June 19, 2011

Father's Day and Thanks

Thanks to everyone who commented on my last post. It never occurred to me that there is a lot going on this time of the year. Since I no longer have kids in school, I don't think about end-of-the-year activities or graduations. We aren't doing much this summer so I don't have vacation in my head, either, although I hope to visit a friend's Upstate (NY) home for a few days. And to go antiquing with her--she says there's lots of fun places to do that!

Mike has enjoyed a nice Father's Day. My sil and bil (Mike's brother) put out an amazing mid-day spread of clams, mussels, king crab legs (!)  and other appetizers. So we are just eating very lightly for dinner tonight. I'll make Mike something another day.

I gave my nephew his finger puppets and he loved them. He's such a nice kid. No matter how many toys he has, he is always pleasant and grateful when you give him something. There's nothing like a 'thanks' and a sweet smile from an almost-6-year-old!

HAPPY FATHER'S DAY!!!!

Saturday, June 18, 2011

KNOCK, KNOCK

IS ANYONE OUT THERE?

C'mon, I have followers. Doesn't anyone read this blog? I turned off word verfication.

I visit many other blogs.

WHERE IS EVERYONE???????????

Thursday, June 16, 2011

Fairy Floral Crown


Here is an easy-to-make floral crown for a little girl. I saw it on a blog, but she got it from someplace else and couldn't remember where, so I suppose it's okay I forgot the blog. The way it is put together came from my own head. 

You need a pipecleaner, some felt and some ribbon. 

Twist a loop of about a half inch (meaning your using up about an inch and a half total) long in one end of the pipe cleaner. 

Cut out a bunch of flowers and leaves. I just did these free-hand. If you trace the bottom of a thread spool and then snip the edges, you get ones that are sort of like bachelor buttons. 

Cut two parallel slits in the middle of each flower or leaf. Slide the pipe cleaner through the slits until you have about an  inch and a half left. Then twist a loop at the other end.


Take your ribbon and cut a length of it--you can figure this out from your own kid's head because you'll be using it to tie on the crown. Make two  of these ribbons. Tie them through the loops.

Your floral crown is finished!

Thursday, June 9, 2011

Another 'finish'

Well, I suppose I should call it a semi-finish, since I left out the last step.

This is a 2-drawer file cabinet cover from the book "One Yard Wonders." Trust me when I tell you: if you are a sewist, you neeeeed this book! It has so many wonderful projects in it from household items to toys to clothing. I am amazed at what you can do with only one yard of fabric.

The cover here is supposed to have loops and big buttons on the front. But a)I just wanted to get it done and b)it's easier to just flip up the front panel when we want access to our files. This thing sits in our bedroom and now it looks so much nicer. I'm out of the plain green fabric but I might try to find some coordinated prints to make a few pillows for the bed.

One of the nice things about only needing a yard is that you can get that expensive 'upholstery' fabric (like what I used here) on the remnant shelf at a discount. I'm sure this cost me less than $7 to make including the bias binding.

Oh...it doesn't have a back. And I finished the 'raw' edges by simply pinking them. What counts is what shows.

Wednesday, June 8, 2011

Just FYI

Nothing exciting here. I just wanted you all to know I turned off 'word verification.' I hope it makes it easier for people to leave comments, 'cause I would  like MORE, LOL!

Monday, June 6, 2011

Finger Puppet Zoo


My little nephew, John, saw me crocheting one day and asked if I could make animals. So I'm going to be several varieties of animals for him for his upcoming birthday. He's going to be 6, or maybe it's 7. They grow so fast.

As you can see, my Zoo has a zebra, a tiger, a lion (I think he looks a little like Groucho Marx), a monkey and a giraffe.

For the zebra and giraffe, I cut extra layers then cut away the spots or stripes before sewing. Tiger's stripes are glued down since I wanted different colors on him.

I wish I'd made the giraffe a little taller, and the Zebra ended up being so small he only fits my pinkie finger. I think he'll be fine for a little boy, though!

These are all done free-hand. I traced around my finger for a basic body pattern, then just fudged it from there. It's mostly done with glue, but sewn around the edges of the body (and across the monkey's mouth).

My next menagerie, which I hope to have done for John's birthday (in July) is a farm: horse, cow, pig, chicken and duck. Or maybe a rooster and a chicken. We'll see. I already have the pig and horse cut out.

Tuesday, May 31, 2011

Innovation

Okay, I'm sure millions of people already know this. But I just thought of it for myself this morning, so for me it is innovative.

I used 4 bottles of barbecue sauce to make ribs on Sunday. There's always some left, you know? That stuff that sticks to the sides. So I wanted to incorporate them together. A balancing act was out of the question.

So I took some foil, folded it up and wrapped it around the necks of two bottles. Now they are in the sink and gravity is doing the rest.

BTW, you want to make killer ribs? First, grill them for a bit on the barbecue. You aren't cooking them, just getting some nice grill marks and a little char on them. Oh...make sure you've emptied out that thing that catches grease or you will have a BIG fire and a lot of heat to deal with. That's another story.

Now, put your ribs into a big lasagna pan. You might need two pans. Dump your favorite sauce over them. Cover with foil.

Cook in a 250 degree oven for 3-4 hours or more. Yes, that's 250 degrees.

You will end up with the most delicious, fall-off-the-bone ribs ever!

Tuesday, May 24, 2011

Pantry-to-Fridge Pickles

(NOTE: This is an earlier post. I'm just redoing it so I don't have to keep looking for it.)
(I use a jar from store-bought pickles, but changed the name!)


I call these "Pantry-to-Fridge Pickles" because you probably have most of the ingredients in your pantry already. My own version is somewhat mild, slightly salty and slightly sweet. These are dill pickles, not sweet pickles, though. Most recipes I found for fridge pickles call for too much sugar, and I hate sweet pickles, to be honest. (Obviously, though, these are not "Kosher" dills.)

You need:

2 cups water
2 cups white vinegar
1/8 cup sugar
1/4 cup Kosher salt (you can use canning salt but I wouldn't know the proportion so play with it)
1 Tablespoon pickling spice

The above list is pretty much 'right,' at least to my taste. But the following is up to you:

Onion powder
Dill weed
Garlic powder

Cucumbers--four to eight to ten depending on how big they are. Figure out what will sit in 4 cups of liquid.

When you buy them, make sure they are very hard, as the pickling will soften them a bit. Unwaxed cukes or Kirbys are best.

Okay, so cut the cucumbers the way you like them and throw them into a bowl. Sprinkle with your herbs and spices. I just eyeball it. You like garlic, add more garlic. This isn't carved in stone, but you should probably go easy the first time around.

Put the water and vinegar in a microwave safe bowl or a pot. I use my 8-cup measuring cup. Nuke or simmer until nice and hot. Then mix in the sugar and salt a pickling spice.

Pour it over the cucumbers. Cover. When it's cooled down a bit, put it in the fridge overnight.

Next day, put the pickles in jars and pour the 'juice' over them. Enjoy!

PS--you can use fresh ingredients, but then this wouldn't be a pantry recipe!

Monday, May 23, 2011

Mama Mia!

Last night, I made homemade mozzarella for the first time. My daughter's friend and her mom were nice enough to teach me!

It is sooo easy! In fact, the hardest part is getting the curds. And all you have to do there is go to an Italian store that makes fresh mozzarella and buy them.

I want to do this a few times until I'm totally sure of myself, but I promise I will post the how-to. You'll be amazed.

Basically, you bring a big pot of water up to temperature (about 180 degrees but wait on that until I post about this again), then you dump in the curds for about 3 minutes (again, I'll have the exact timing later).

Then you strain the curds out into a bowl. They will be somewhat stringy. Wearing gloves (because the curds are HOT) you pick up the blob and fold it up, then you just let it stretch down. You keep turning and folding until the stretchiness slows down and the cheese is shiny. You wrap it up into a ball and put plastic wrap around it. Then you put it in the fridge.

Or you eat it right away because fresh mozzarella is AWESOME.

Or...and we had this as a snack last night: instead of smushing it into a ball, you take the stretched out piece and lay some prosciutto on it, then you roll it up and cut pinwheels. I don't even like prosciutto and I had two of these.

I promise I'll post a how-to ASAP. But next post, I will share my own Pantry-to-Fridge pickle recipe!

Monday, May 16, 2011

Crochet Vest


Here's a vest I've been working on for a while. It's on the cover of the March/April issue of Crochet Today magazine. The yarn is 'Beach Glass' which is a Bamboo Ewe yarn.

This was a good pattern to use because it is made in one piece (you sew it together at the shoulders) and because it is a vest there are no sleeves. I just finished the armholes and the next thing to do is the wide, ridged border. It closed with 3 buttons. It might get too warm to wear it soon, but it would be nice where there is air-conditioning. And I'll wear it in the fall even though "Beach Glass" is certainly a summer color!