I decided I needed a new apron, since most of mine are up in the attic. Some relate to holidays and some to seasons that are not 'winter.' Here it is, in the works. Most of it is done and I should have it finished tomorrow. It's just a simple rectangle one, nothing fancy.
Showing posts with label aprons. Show all posts
Monday, February 20, 2012
Wednesday, August 3, 2011
Apron, mostly done
The apron is done except for putting on some ties. As you can see, it's reversible. I used fancy stitching for the heart appliques because it shows up on the other side. It isn't very visible against the busy floral background, but it's there.
Can you see how the bias tape has different colors? (Can you also ignore my messy office?)
Tuesday, August 2, 2011
Apron part III or so
I think it's fun to make multi-colored bias tape with fabric scraps. This is the binding that goes around the apron.
There are many excellent tutorials on line to make bias tape, especially the continuous kind. Mine is in sections, obviously. You simply fold your fabric into a triangle so that the lengthwise grain edge meets the crosswise edge. The slanted fold is now your bias. If you measure along this fold, remember to only measure half the width of your tape! (When you open the fold out, obviously you'll now have the full size.) I measured an inch from the fold to get a 2-inch-wide strip.
Then, being somewhat impatient and non-fussy, I just used that 2-inch strip to mark off more 2-inch strips. (I do like wide bias tape, LOL!) Then I just sewed the strips together. (I'm thinking of making templates for this in various widths out of cardboard.)
As you can see above, I folded the long strip in half and ironed it. Then I folded the raw edges into the center. (That step is obviously the top photo.) The result you get is super-cute, original and colorful bias tape!
I took pictures of the apron, which is now finished except for the ties. I either have to plow through my fabric stash and find something to match or go out an buy ribbon. (For all the ribbon I have, nothing works with this, LOL!) Pictures tomorrow, I promise!
Monday, August 1, 2011
Apron, continued
Cut another strip as wide as the apron and as deep as you want it. Sew it along the bottom edge of the top piece. I just sewed it right through the blue 'lining' apron.
Fold and press. Repeat this with as many strips as you want. Mine only has 3. I'll show you the rest next post, as well as the bias tape I made for it.
BTW, almost finished one sock and 90% done with the other. They look sort of weird but they fit. I also have two rows stitched together for the snowflake blanket and five snowflakes ready for the next row. Picture soon, I promise!
Fold and press. Repeat this with as many strips as you want. Mine only has 3. I'll show you the rest next post, as well as the bias tape I made for it.
BTW, almost finished one sock and 90% done with the other. They look sort of weird but they fit. I also have two rows stitched together for the snowflake blanket and five snowflakes ready for the next row. Picture soon, I promise!
Saturday, July 30, 2011
A new Apron project
I recently bought a package of cloth napkins on the clearance rack. For some reason they are 28 inches squared. Who on earth needs a napkin that is bigger than 2 feet on any side? Did the makers think someone was going to a luau and planning to eat the whole pig?
Okay, so I decided to make one into an apron. Actually, one side of an apron. I simply used an old apron to mark and cut the armholes.
Then I cut off all the selvedges. You'll see why in a future post. I took a piece of scrap fabric, cut it to fit the top 1/3 of the apron and sewed it on--wrong sides together. I'm binding this, not turning it inside out.
The apron is almost finished but I will post a picture or two at a time.
Wednesday, July 13, 2011
I like aprons
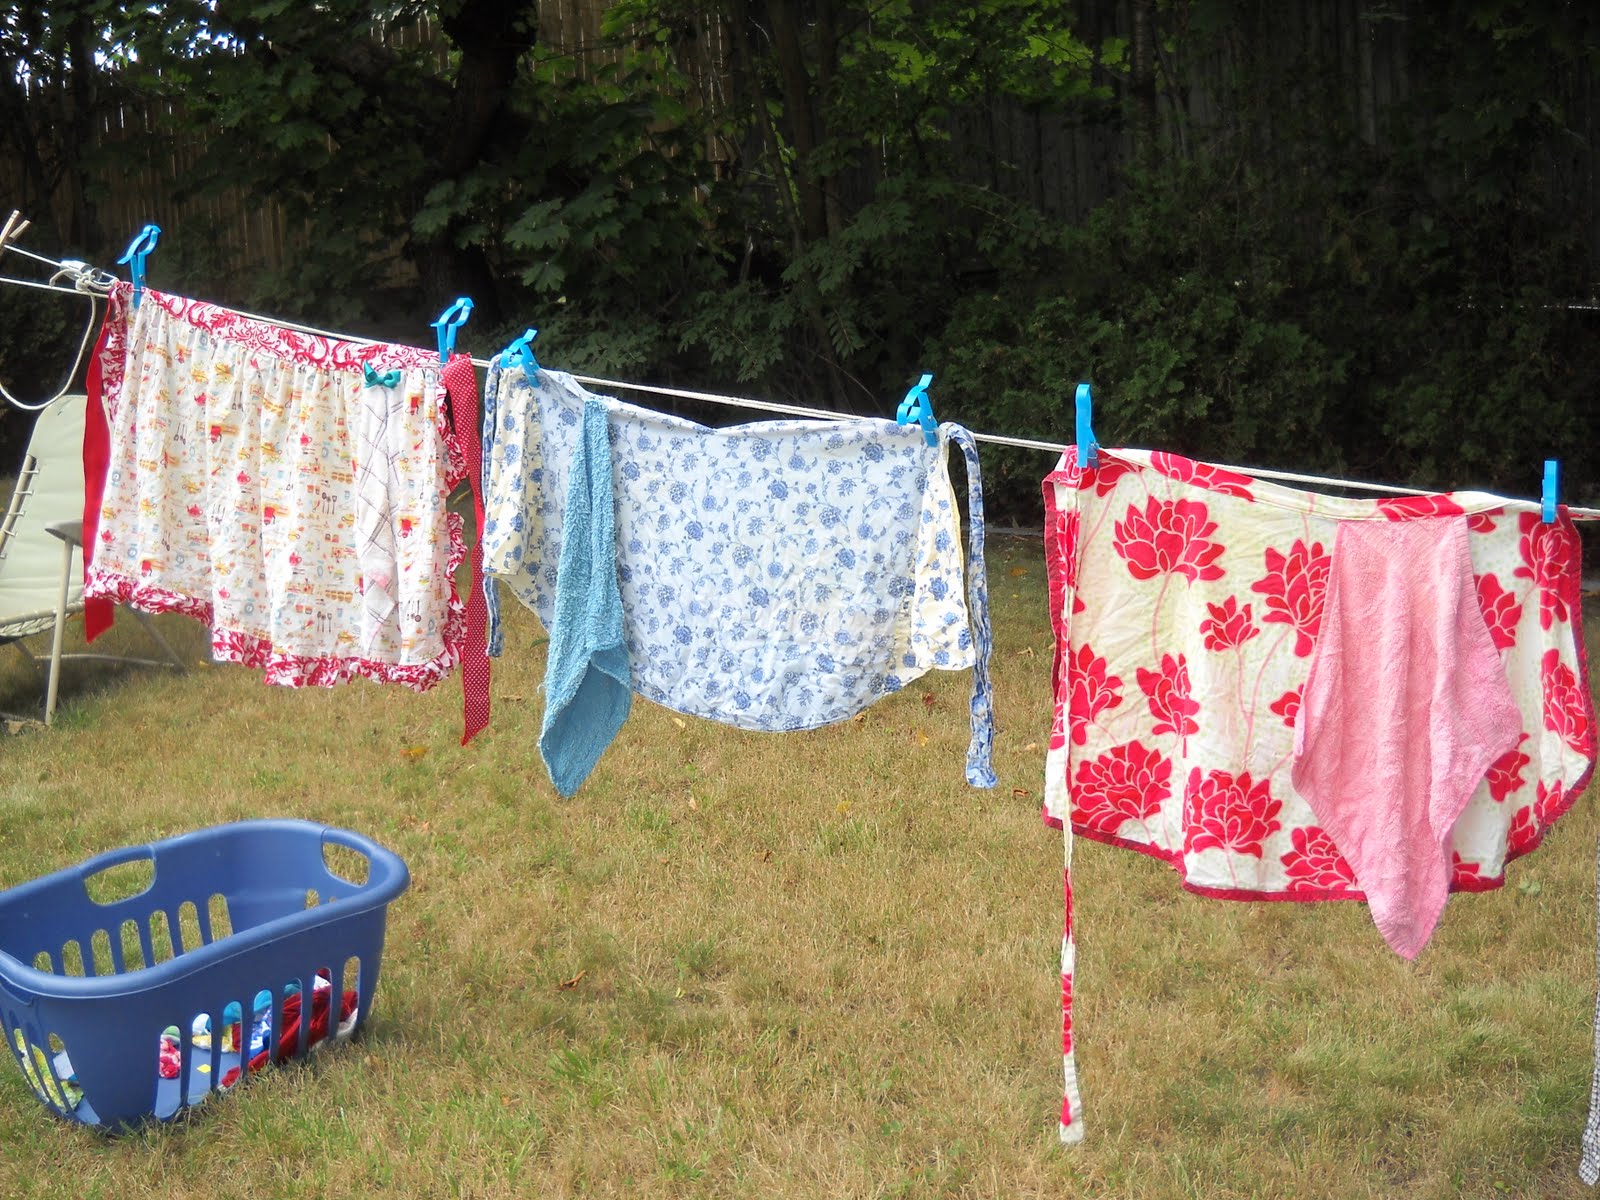
Aprons are so much fun, aren't they? Such a great use for so little fabric and effort. Here are just three of mine out on the clothesline--more along the line but I couldn't get them all in a picture. One thing I always do with the aprons I make is to sew a washcloth into the waistband. This gives you something to wipe your hands on besides the apron itself.
The two to the right are from the book "A is for Apron" using my own choice for fabric. The pattern for the one with the red flowers is my favorite because there are no gathers in the waistline. It's cut on a curve and sits nicely on you--and doesn't add extra weight to someone who is already pudgey.
For the middle one, I used two fat quarters. I cut one in half and sewed it to either side of a whole fat quarter, then cut the pattern from there.
The first apron isn't from the book. It's just a half yard of fabric, plus the trimming.
There are so many ways to make aprons, aren't there? And I just love how they look on the clothesline...so colorful!
The two to the right are from the book "A is for Apron" using my own choice for fabric. The pattern for the one with the red flowers is my favorite because there are no gathers in the waistline. It's cut on a curve and sits nicely on you--and doesn't add extra weight to someone who is already pudgey.
For the middle one, I used two fat quarters. I cut one in half and sewed it to either side of a whole fat quarter, then cut the pattern from there.
The first apron isn't from the book. It's just a half yard of fabric, plus the trimming.
There are so many ways to make aprons, aren't there? And I just love how they look on the clothesline...so colorful!
Subscribe to:
Posts (Atom)